Install Remote Desktop Services in Windows Server 2012
Remote Desktop Services (RDS) in Windows Server 2012 is Microsoft’s VDI (Virtual Desktop Infrastructure) offering. RDS formerly known as Terminal Services (TS) provides session-based virtual desktops, virtual-machine based virtual desktops and applications to end users. To be able to use these features, you must install Remote Desktop Services in Windows Server 2012 or 2012 R2. So, in this post I will show steps to install Remote Desktop Services in Windows Server 2012.
Install Remote Desktop Services in Windows Server 2012
The diagram below shows the scenario for this post. The network consists of one domain controller and one RDS server.
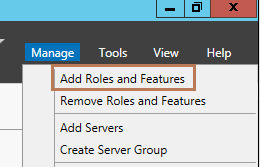
Log on to RDS server (MBG-RDS01). Open Server Manager. Click Add Roles and Features.
Click Next on Before you begin page. Choose installation type as Remote Desktop Services installation. Click Next.
As you can see below there are two ways of installing RDS services in Server 2012. They are quick or standard. In quick deployment option, three of the required RDS services are installed on single server. The three services are, RD Session Host, RD Connection Broker and RD Web Access. Similarly, the quick installation also creates a collection and publishes some RemoteApp programs. Here, I will install quick deployment option. If you wish to separate each RDS components then you can choose standard deployment option. Choose Quick Start as Deployment Type and click Next.
Deployment Scenario can also be either virtual machine-based or session-based. Here, I will choose session-based. Click Next.
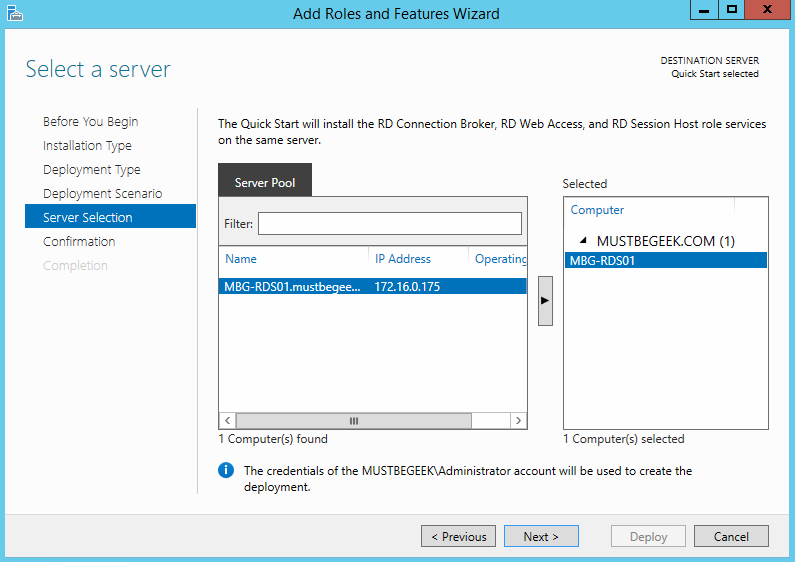
Under Server Selection page, the current server will be automatically added as shown below. Click Next.
Review the installation options. Check, Restart the destination server automatically if required option. Click Deploy.
The installation will now begin. The server will reboot automatically. After the reboot, log back in, you can see the installation has completed successfully. Click Close.
Now, let’s verify the installation. Open Server Manager. Click Remote Desktop Services on the left pane. You can see the RDS deployment Overview as shown below. As we can see, RD Web Access, RD Connection Broker and RD Session Host have been installed. If you want applications or desktop sessions to be accessed from the Internet then you have to install RD Gateway. Similarly, You must install RD Licensing to activate RDS server.
You can also view installed applications. Under Collections, click QuckSessionCollection which is just a collection named created by Quick Deployment installation option. As you can see, calculator, paint and wordpad applications have been published.
To access those applications, open web browser and type URL of RD Web Access server. Type username and password and log on the server as shown below. You can also customize the look of RD Web Access page.
You can view the published applications below. Double-click to open any application. I have double-clicked calculator.
Accept the certificate warning. The application will open as shown below.
So in this way you can install RDS in Windows Server 2012 using Quick Deployment option. You can now install certificates, publish required apps, publish session-based desktops, customize RD Web Access, and so on.


