Step-by-Step Guide – ESXi 5.5 Installation
Overview
VMware ESXi 5.5 is the bare metal hypervisor from VMware. This is the software we install onto physical servers in the Datacenter. ESXi is managed by VMware vCenter server. For your home-lab you will need two ESXi 5.5 hypervisor instances. ESX1 & ESX2. Both will be used, and managed by your vCenter 5.5 Server. There are two types of Hypervisors;
1) Bare-Metal Hypervisors – Run directly on the host computers hardware to control resources and manage guest operating systems. E.g VMware ESXi, Citrix Xen Server, Microsoft Hyper-V.
2) Hosted Hypervisors – Run on-top of an existing operating system e.g Windows 7. This type of type of hypervisor runs as a separate layer on-top of the existing operating system as an application. Usually this type of hypervisor is for testing/lab purposes. E.g VMware Workstation, Microsoft Virtual PC, Parallels Desktop.
This guide focuses on how to install a successful instance of the ESXi 5.5 bare metal hypervisor within VMware workstation for your home lab. If you are installing ESXi on a physical server follow steps 1,3,4,5 and 6.
CONTENTS
- Download ESXi 5.5 software from VMware
- Set-Up Virtual Machine in VMware Workstation
- Install ESXi 5.5
- Configure – Hostname, IP Address, Gateway, DNS on ESXi 5.5
- Test Installation – Access ESXi 5.5 using the C# Windows vSphere Client
- Repeat – Steps 2-5, to create the 2nd ESXi 5.5 Server for your Lab.
PREREQUISITES
Minimum System requirements for VMware ESXi 5.5;
- Processor – Intel or AMD x64 processor
- Memory – 4GB Minimum
- Disk Storage incl scratch – 5.2GB at least
- Network – 1Gbps Recommended
Detailed system requirements are available here, however the above will suit most home lab requirements.
KEY CONFIGURATION INFORMATION
ESX1
- Hostname – ESX1.vmlab.com
- IP Address – 10.0.0.50
- Subnet Mast – 255.0.0.0
- Default Gateway – 10.0.0.2
- DNS 1 – 10.0.0.5
- DNS 2 – 8.8.8.8
ESX2
- Hostname – ESX2.vmlab.com
- IP Address – 10.0.0.60
- Subnet Mast – 255.0.0.0
- Default Gateway – 10.0.0.2
- DNS 1 – 10.0.0.5
- DNS 2 – 8.8.8.8
1. DOWNLOAD ESXI 5.5 SOFTWARE FROM VMWARE
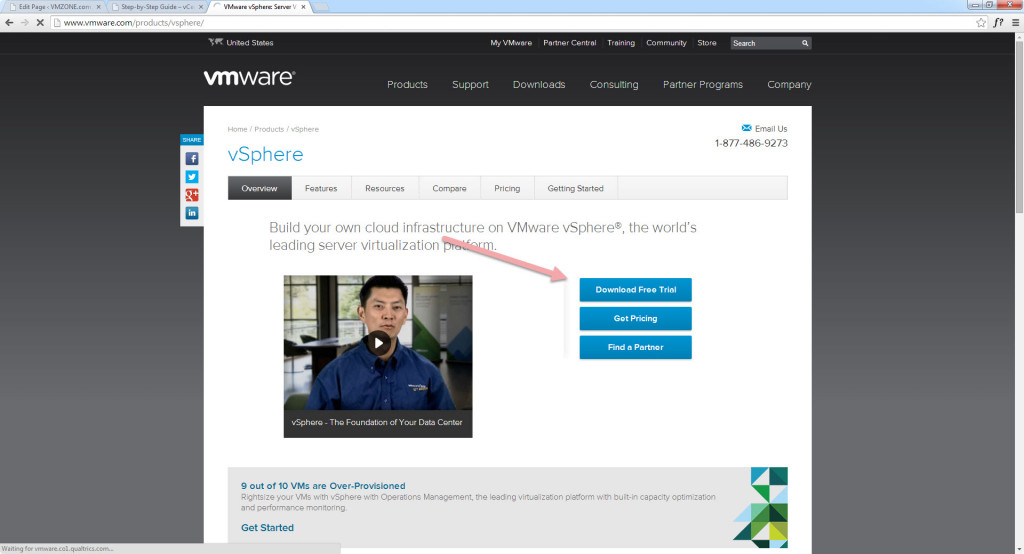
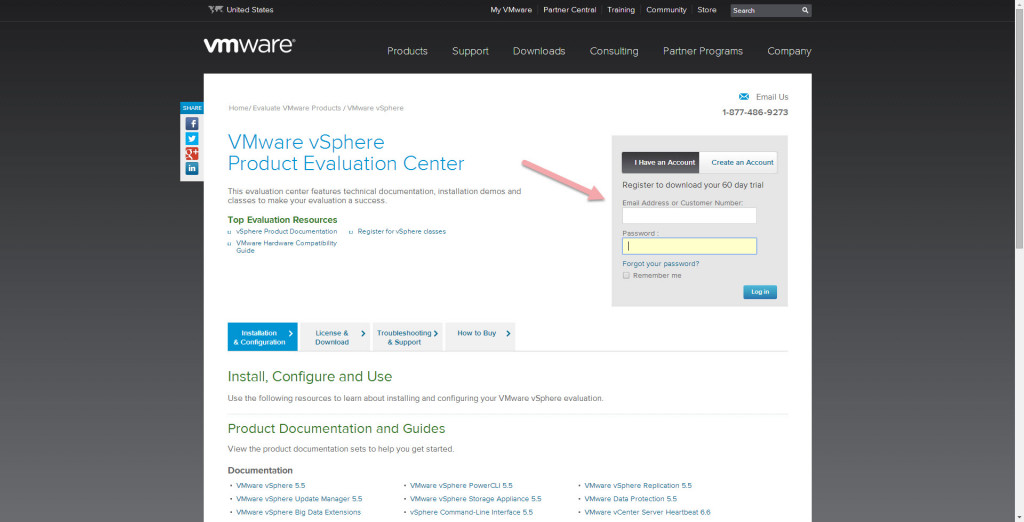
Step 1 – Go to vmware.com and navigate to the section where you can trial vSphere 5.5 or use this link > Register for a trial account > Login
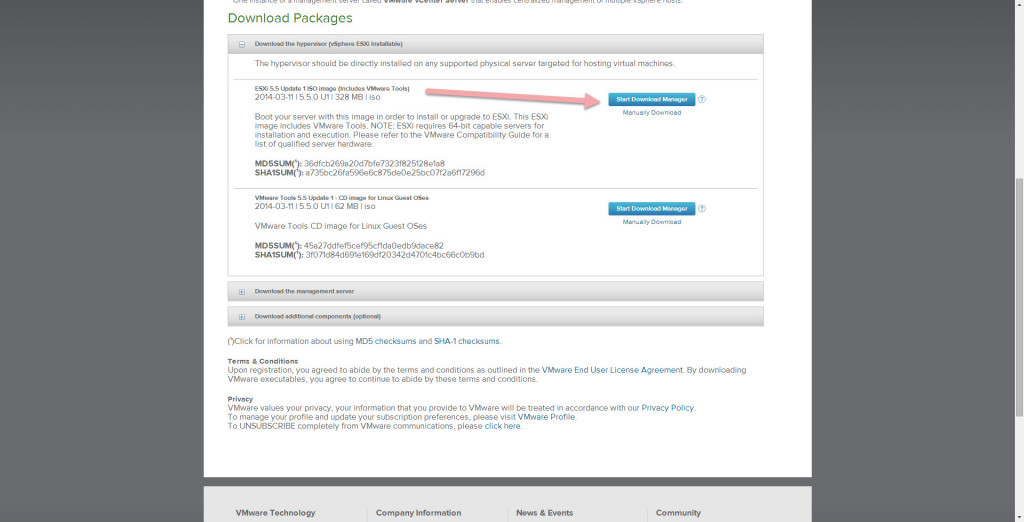
Step 2 – Once logged in > Scroll to the download section > Download ESXi 5.5 ISO Image File.
2. Set-Up Virtual Machine in VMware Workstation
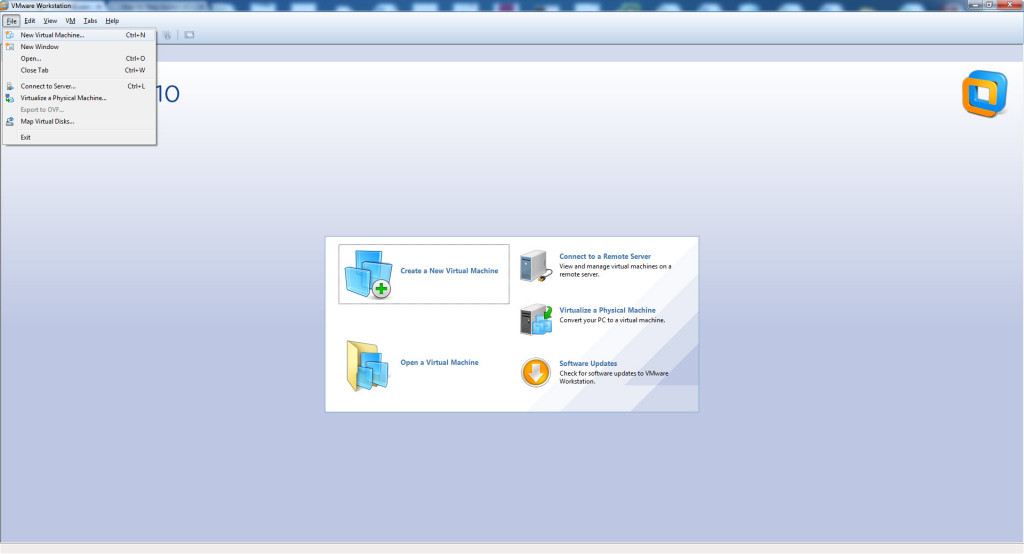
Step 1 – Open VMware Workstation > Click File > New Virtual Machine (Wizard)
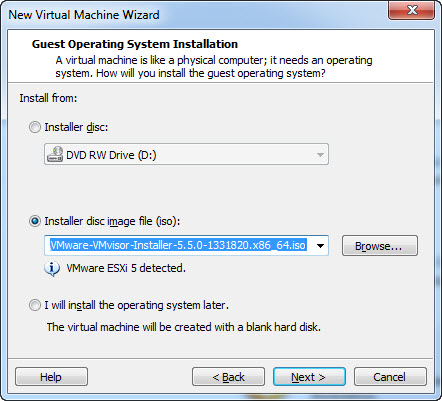
Step 2 – The New Virtual Machine will appear > Select Installer Disk Image File (ISO) > Browse & Select the Downloaded ESXi 5.5 ISO Image from above.
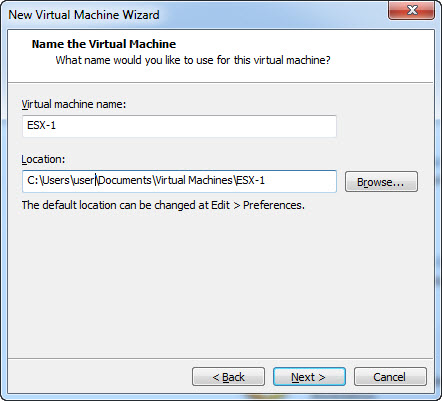
Step 3 – Give your virtual machine a name. For the purposes of this LAB it will be ESX-1.
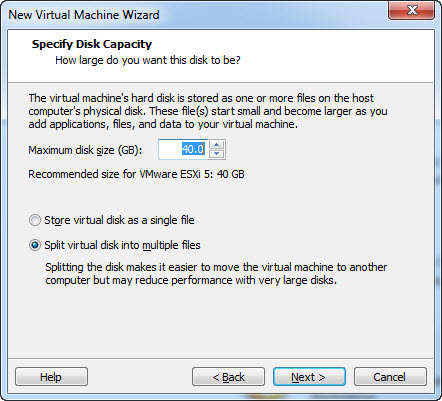
Step 4 – Specify the disk size. 40GB is the default and is more than enough.
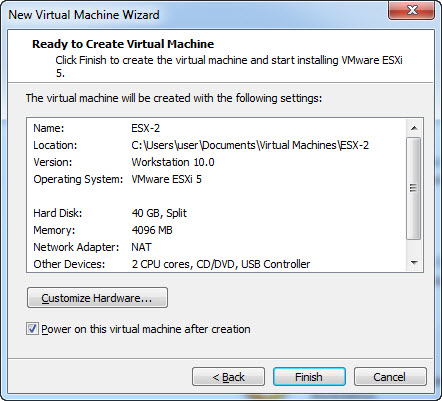
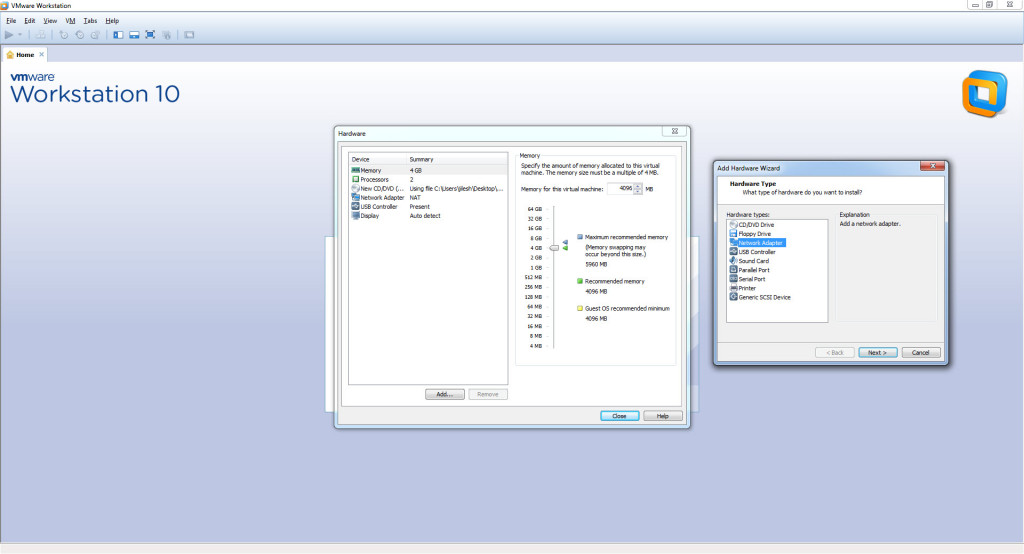
Step 5 – Before you click Finish, select “Customise Hardware”.
Step 6 – 3 Virtual Network Cards are required for your lab per ESXi Host. Select “Add” to open the Add Hardware Wizard and follow the steps to add 2 more network cards to your virtual machine.
Step 7 – Click on Finish, and wait for your virtual machine to Power on Successfully.
3. INSTALL ESXI 5.5
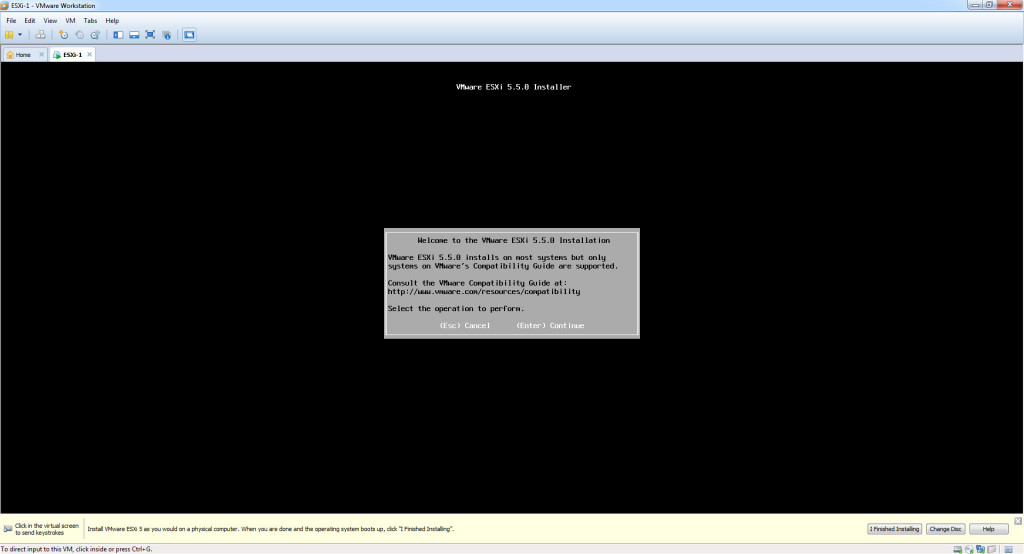
Step 1 – Power on your Virtual / Physical Machine, and boot from the ESXi 5.5 ISO Image > Press Enter to Start the installation wizard.
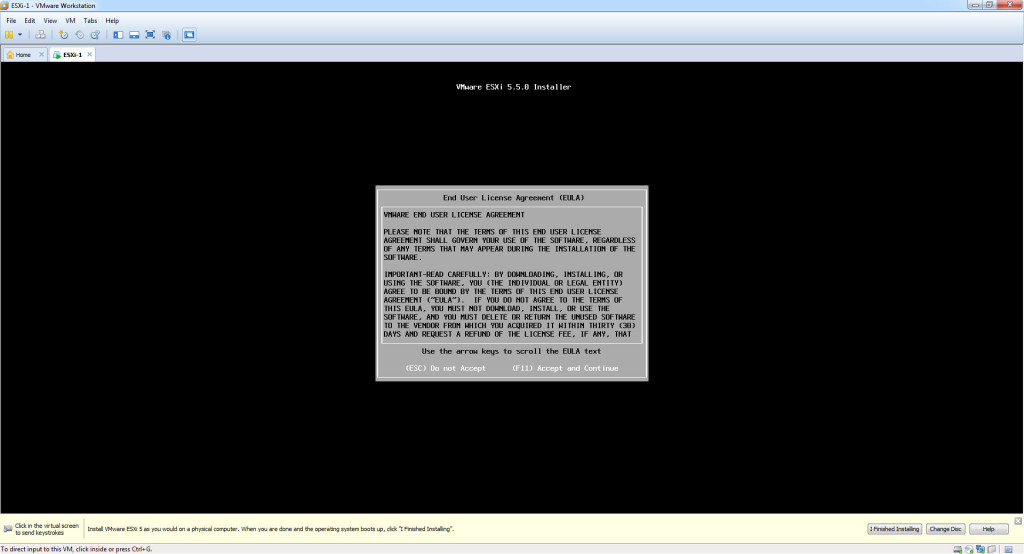
Step 2 – Accept EULA > Press F11
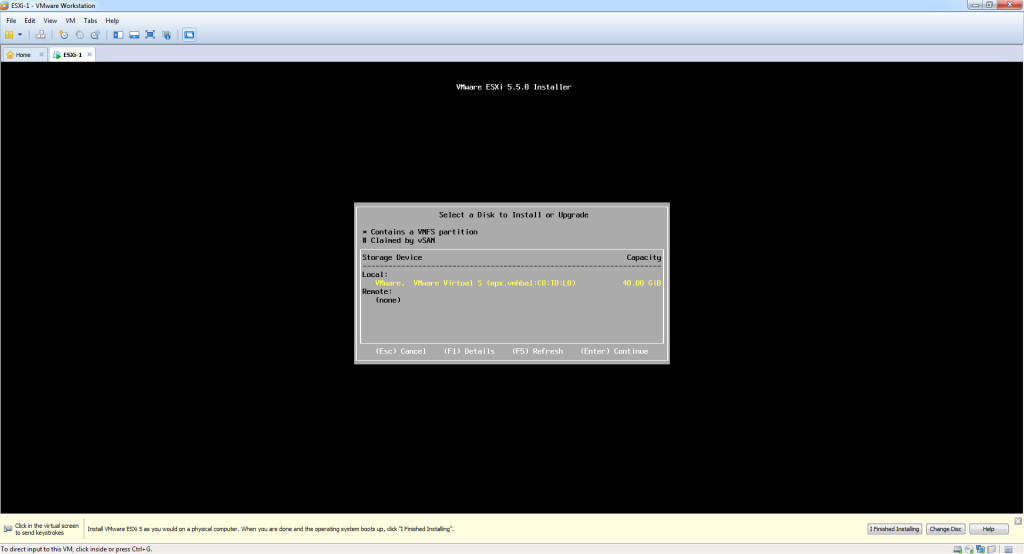
Step 3 – Select the Local Disk for the Installation > Press Enter
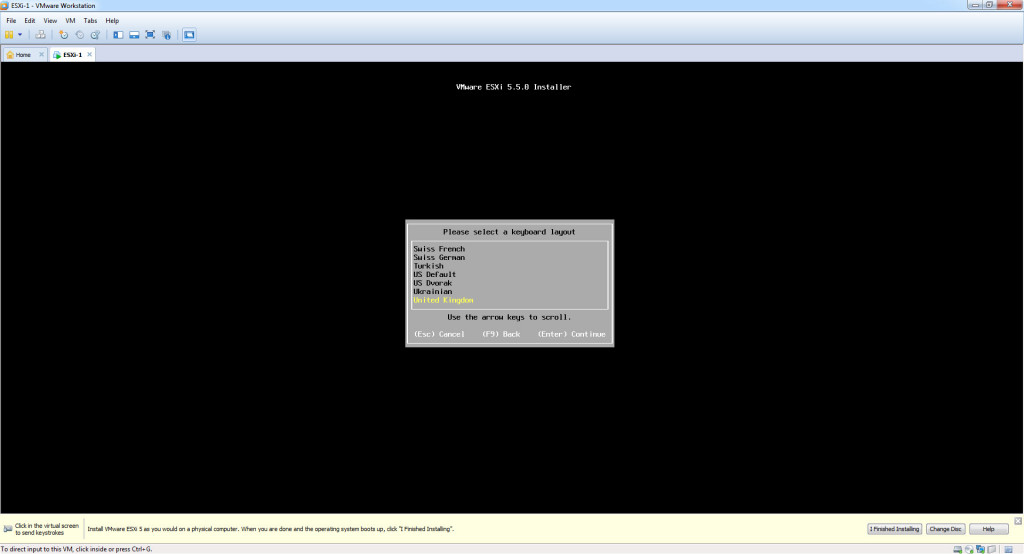
Step 4 – Select your keyboard locale > Press Enter
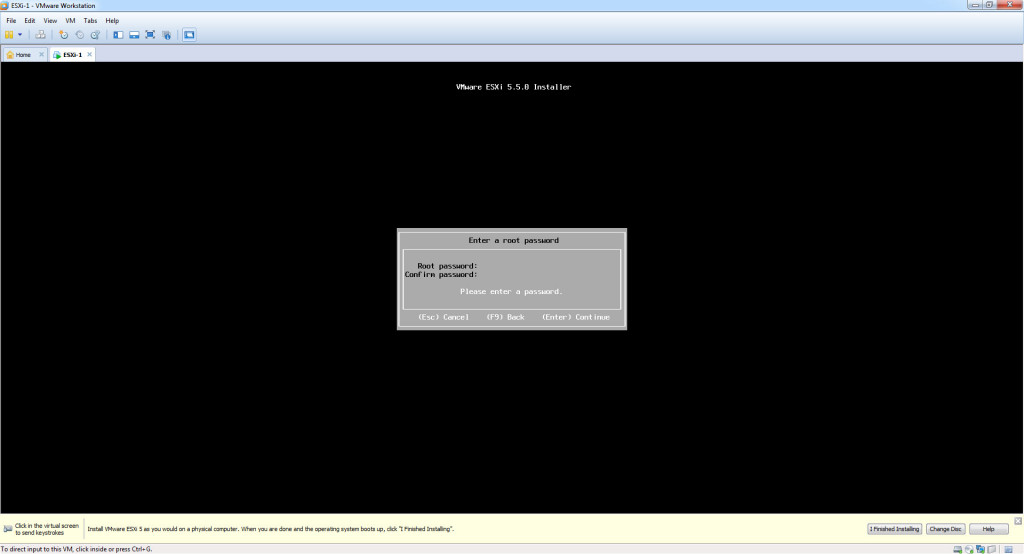
Step 5 – Type a complex password, with a minimum of 7 characters > Press Enter
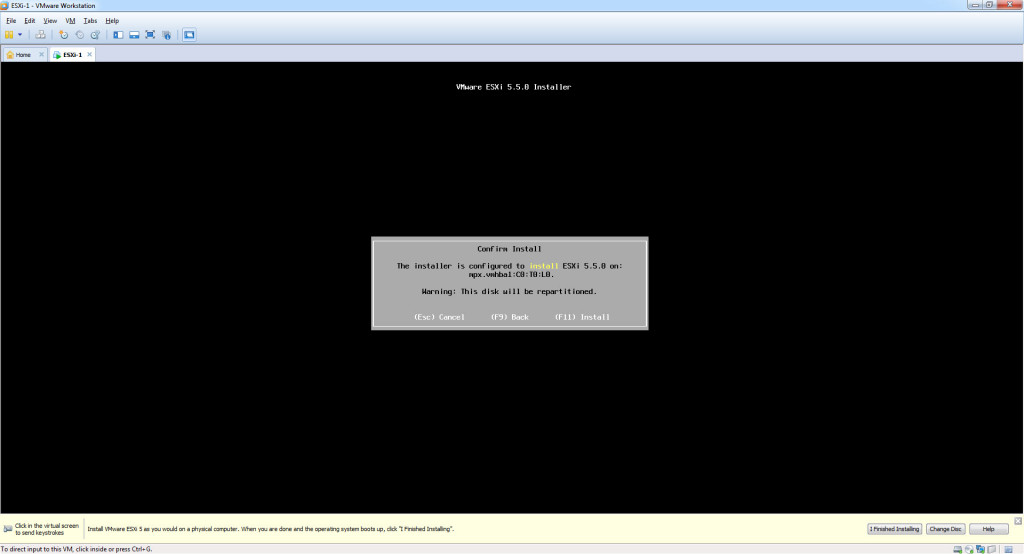
Step 6 – Confirm > Press F11 to start the installation
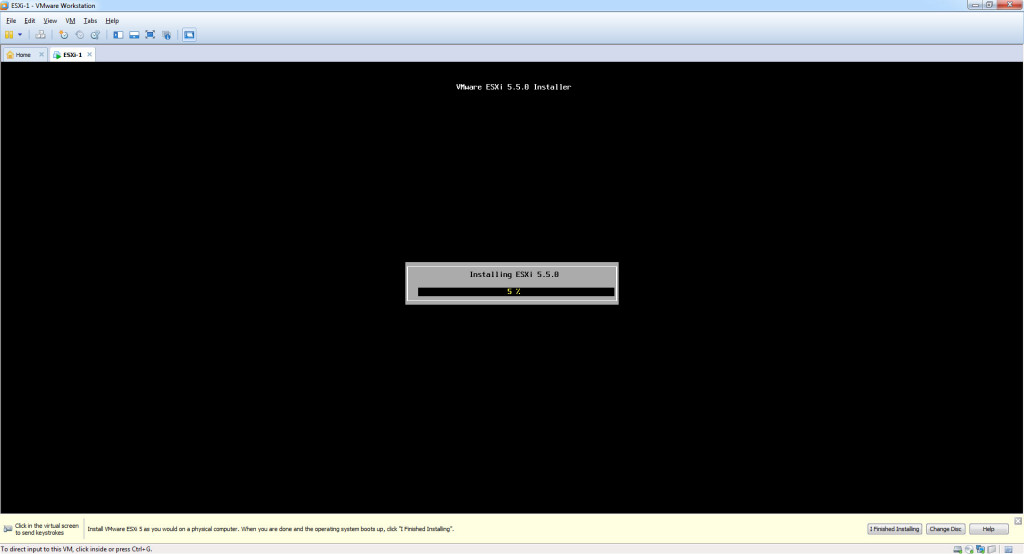
Step 7 – Installation will take about 2-5 minutes to complete.
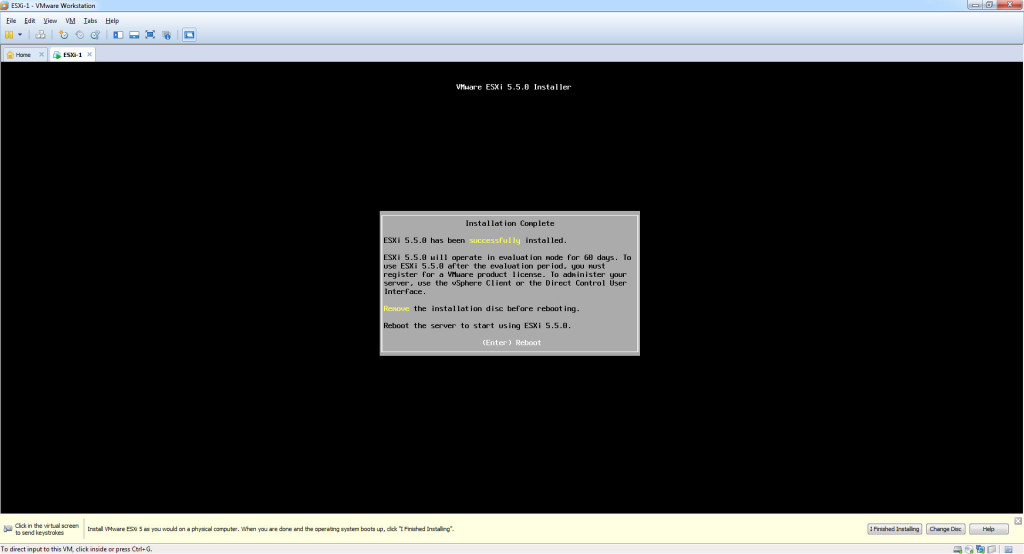
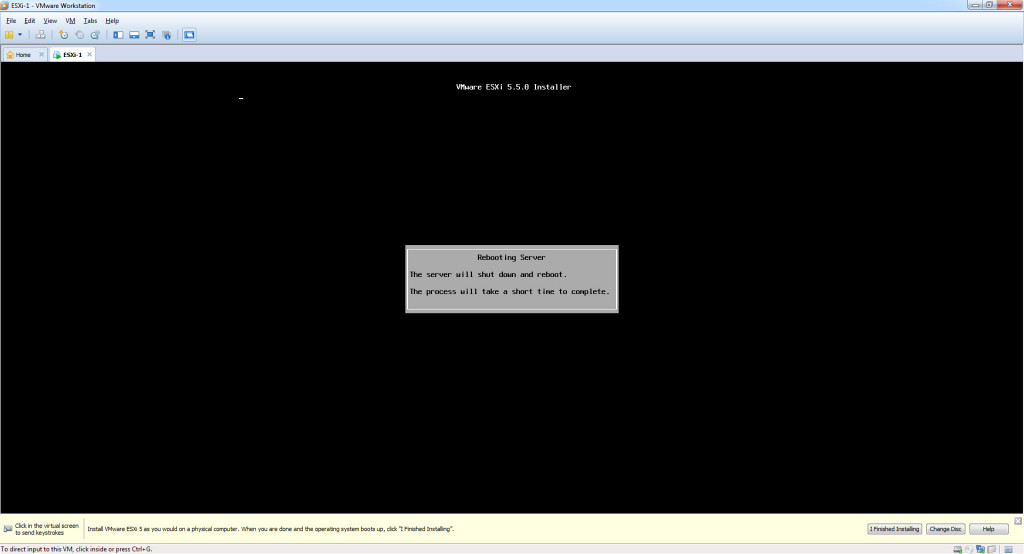
Step 8 – Press Enter to Reboot once the installation has completed successfully.
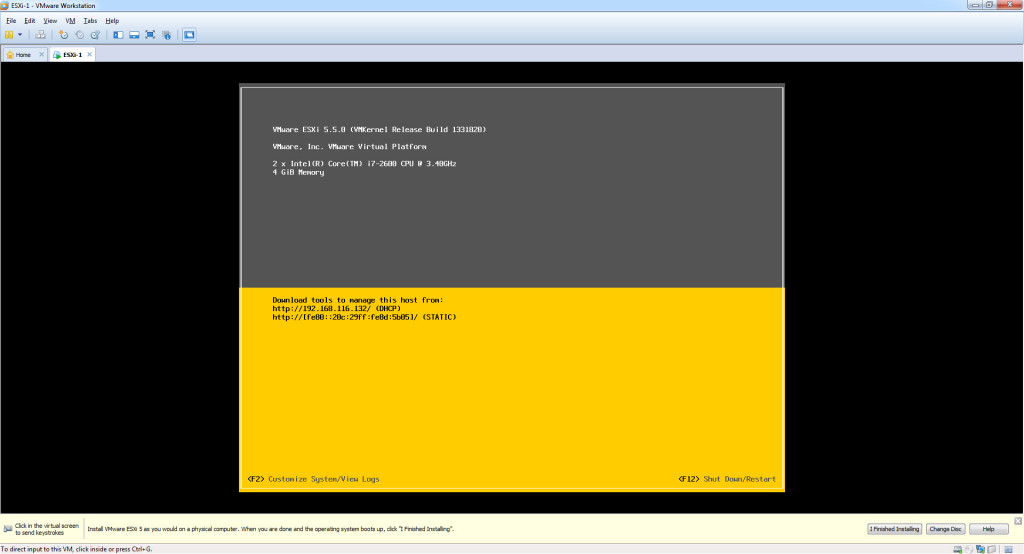
Step 9 – Wait for reboot to complete
4. CONFIGURE – HOSTNAME, IP ADDRESS, GATEWAY, DNS, PASSWORD ON ESXI 5.5
Once reboot has completed, your installation is now complete. The next step is to configure your ESXi 5.5 Host.
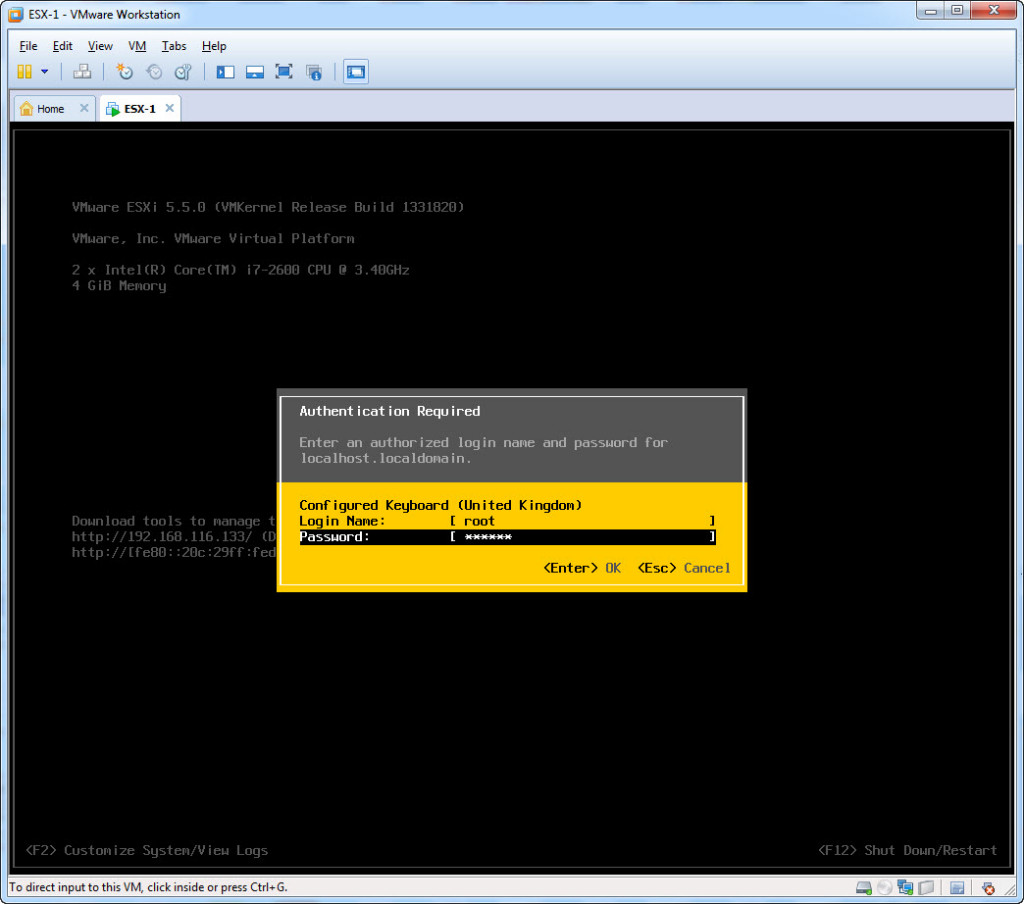
Step 1 – Press F2 to enter the configuration mode
Step 2 – You will be promoted for the password which you created during the installation (note – the default user name is – root).
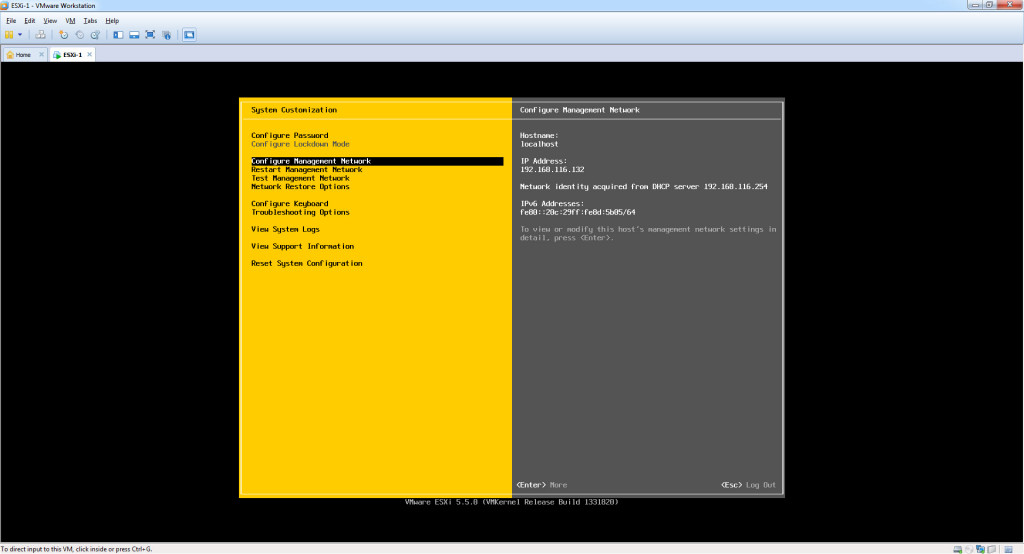
Step 3 – The next step is to configure the management network interface. Select “Configure Management Network” > Press Enter.
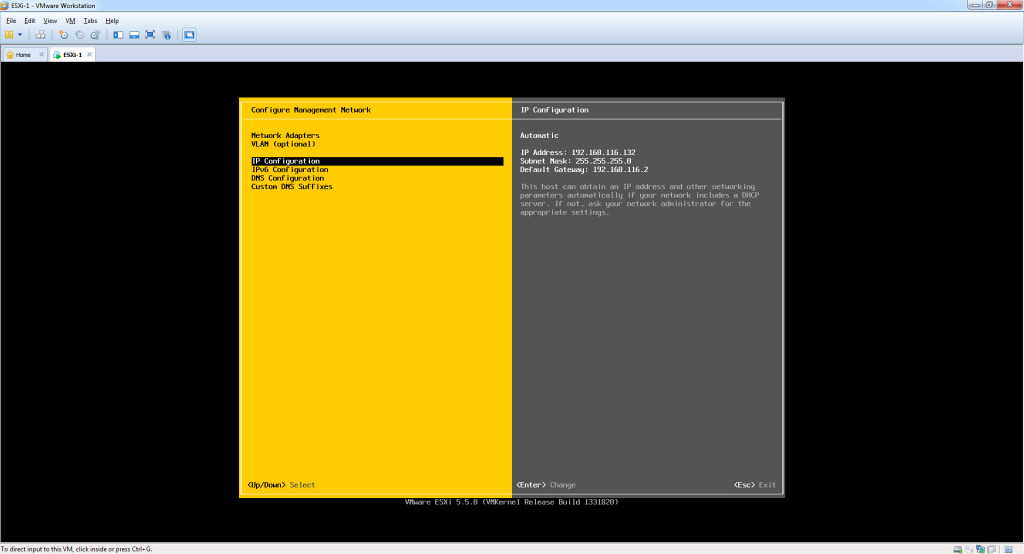
Step 4 – Select IP Configuration > Press Enter
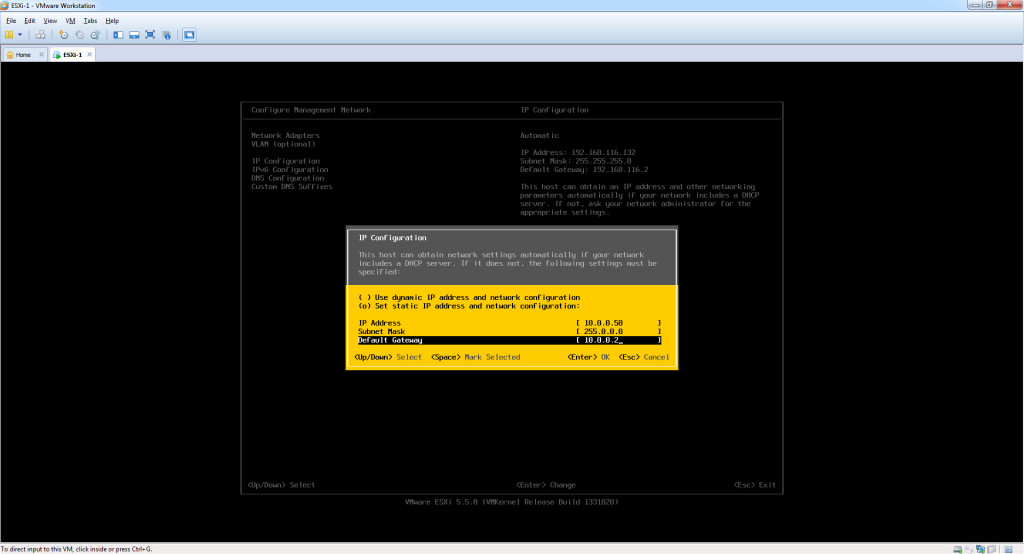
Step 5 – Select “Set Static IP Address and Network Configuration” > Type the static IP Address / Subnet mask and default gateway for ESX1 from the top, or one of your choice > Press Enter once complete.
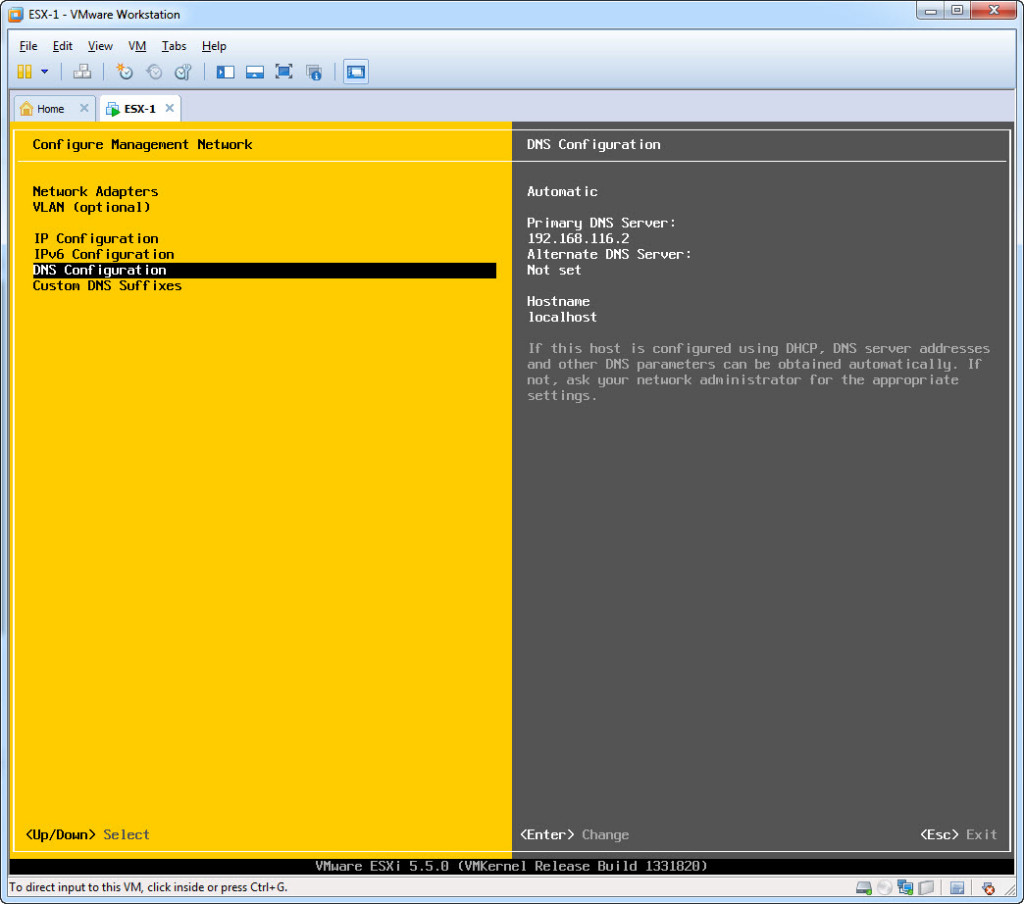
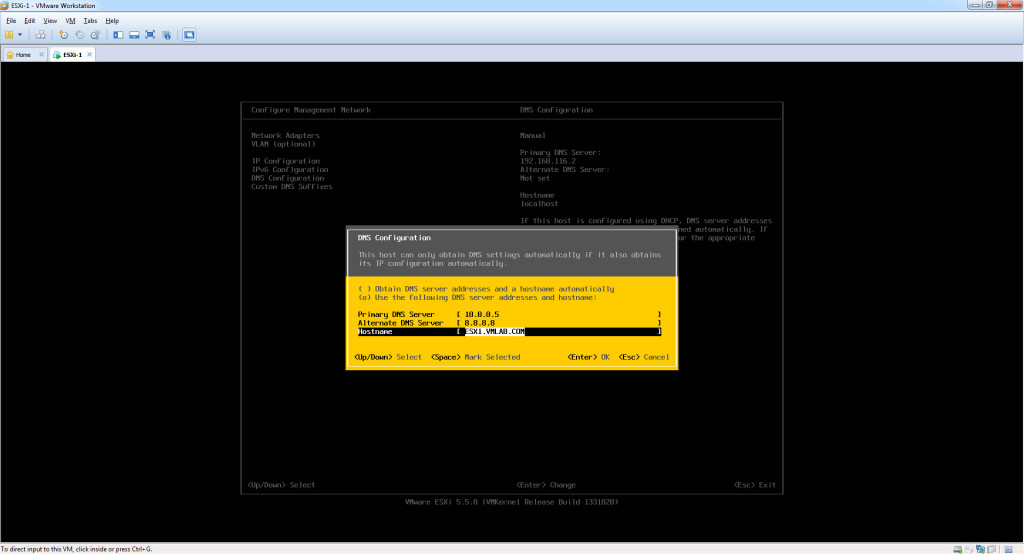
Step 6 – Select “DNS Configuration” > Press Enter
Step 7 – Type the Primary DNS Server / Alternate DNS Server and Hostname for ESX1 from the top, or one of your choice > Press Enter once complete.
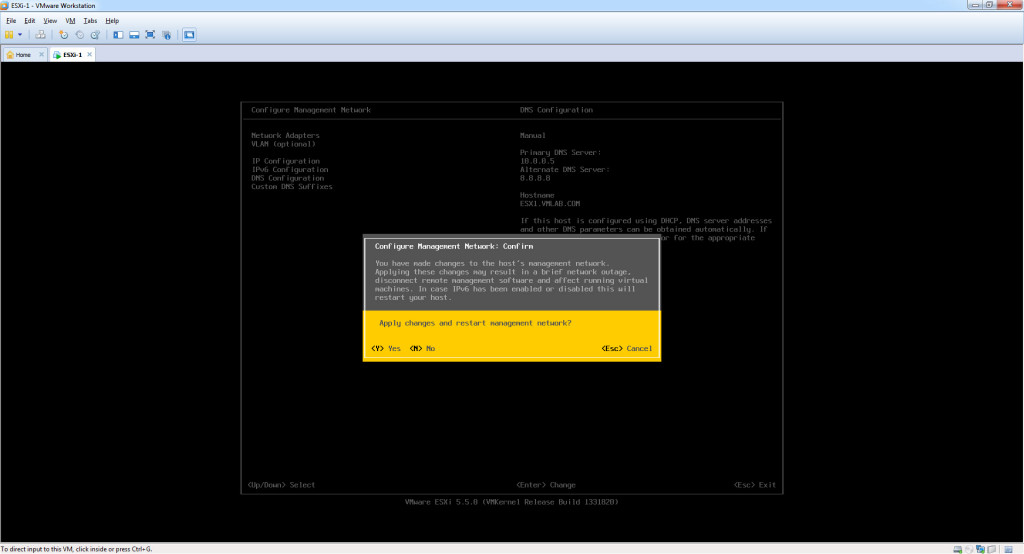
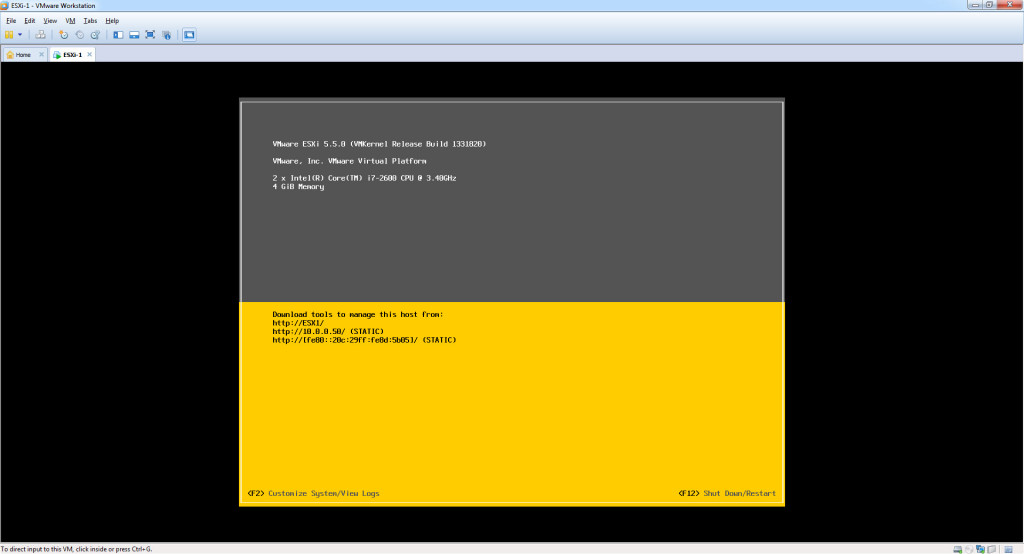
Step 8 – You will currently be in the “Configure Management Network” Menu. You have completed all configuration required for ESX 1. To Exit this menu and SAVE configuration > Press ESC > Type [Y] to “Apply changes and restart management network”. This will allow you to successfully exit the ESXi 5.5 configuration menu, back to the home screen.
Step 9 – You have successfully completed configuration for ESXi 5.5 with the host name ESX1.
5. TEST INSTALLATION – ACCESS ESXi 5.5 USING THE C# WINDOWS VSPHERE CLIENT
Now that you have successfully set-up and configured your ESXi 5.5 host, you need to test connectivity to it. Assuming that the networking is set-up and on the same subnet, everything should work fine. You may at this point want to ping from your local machine to test connectivity to your set-up.
This section assumes that you have vSphere C# Client installed on the system you want to access and manage your ESXi hypervisor from. If not, you can follow the guide to install vSphere C# Client fromhere (Step 6) before the below.
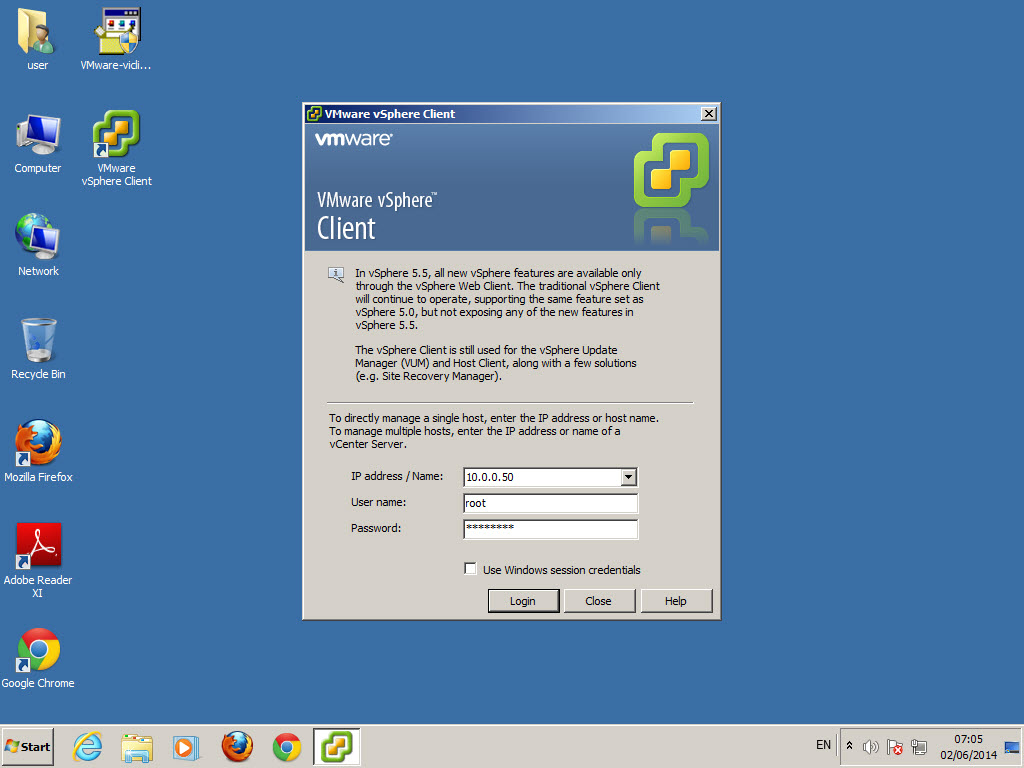
Step 1 – Open the vSphere C# Client from the system where it is installed > Type the host name (ESX1.VMLAB.COM) or the IP Address (10.0.0.5) you have configured on your ESXi host > Type the default username – root > Type the password you had configured during the installation for the ESXi server > Press Login.
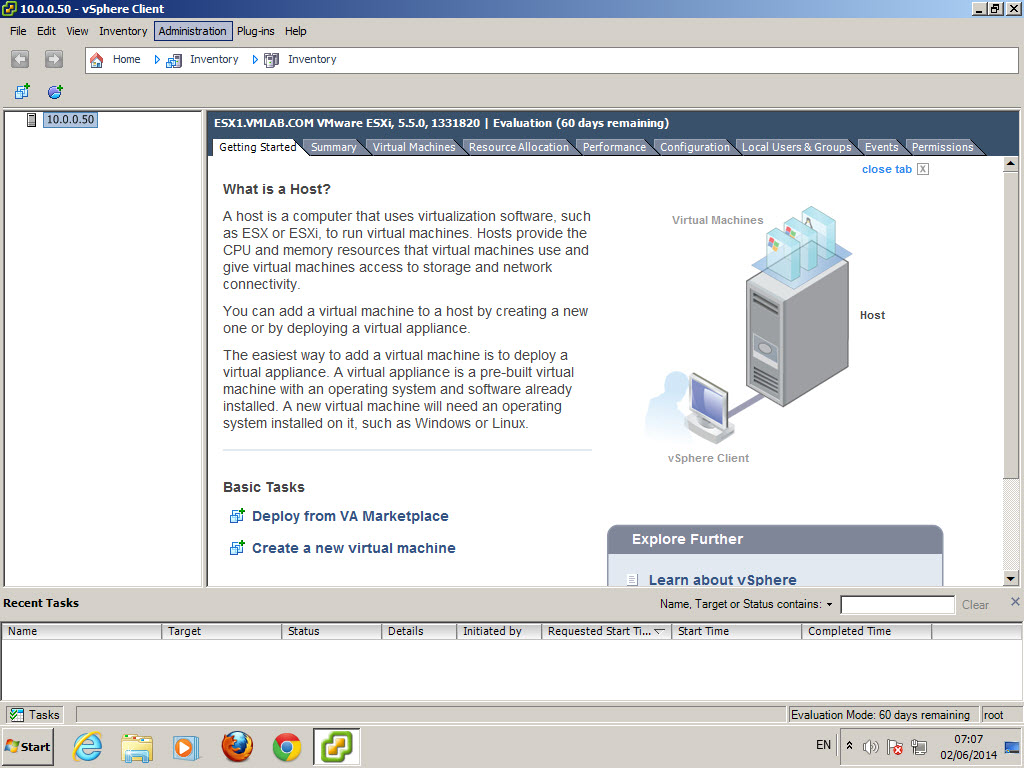
Step 2 – Success! If there are no login credentials or network issues, you will see the below screen which indicates a successful and complete installation of ESXi 5.5. You can now start to create virtual machines!
6. REPEAT – STEPS 2 – 5, TO CREATE THE 2ND ESXI 5.5 SERVER FOR YOUR LAB
If you are preparing a home lab, you will need at minimum 2 ESXi 5.5 installation instances either virtual or physical. Follow steps 2 – 5 above to create another instance of ESXi 5.5 with the host name ESX2.VMLAB.com
Your Lab is now successfully configured with ESXi 5.5. The fourth part in this series looks at the installation and configuration of shared storage for your home lab. Specifically iSCSI & NFS virtual storage.
